
Children have made mud pies for as long as there has been mud. A mud kitchen formalizes the idea: a low outdoor station with pots, spoons, soil and water where children cook pretend meals. At a spring party it offers something soft play and games cannot, which is the deep, focused satisfaction of making a mess with purpose. Here is how to set one up and keep the rest of the party clean while you do.
What a Mud Kitchen Is
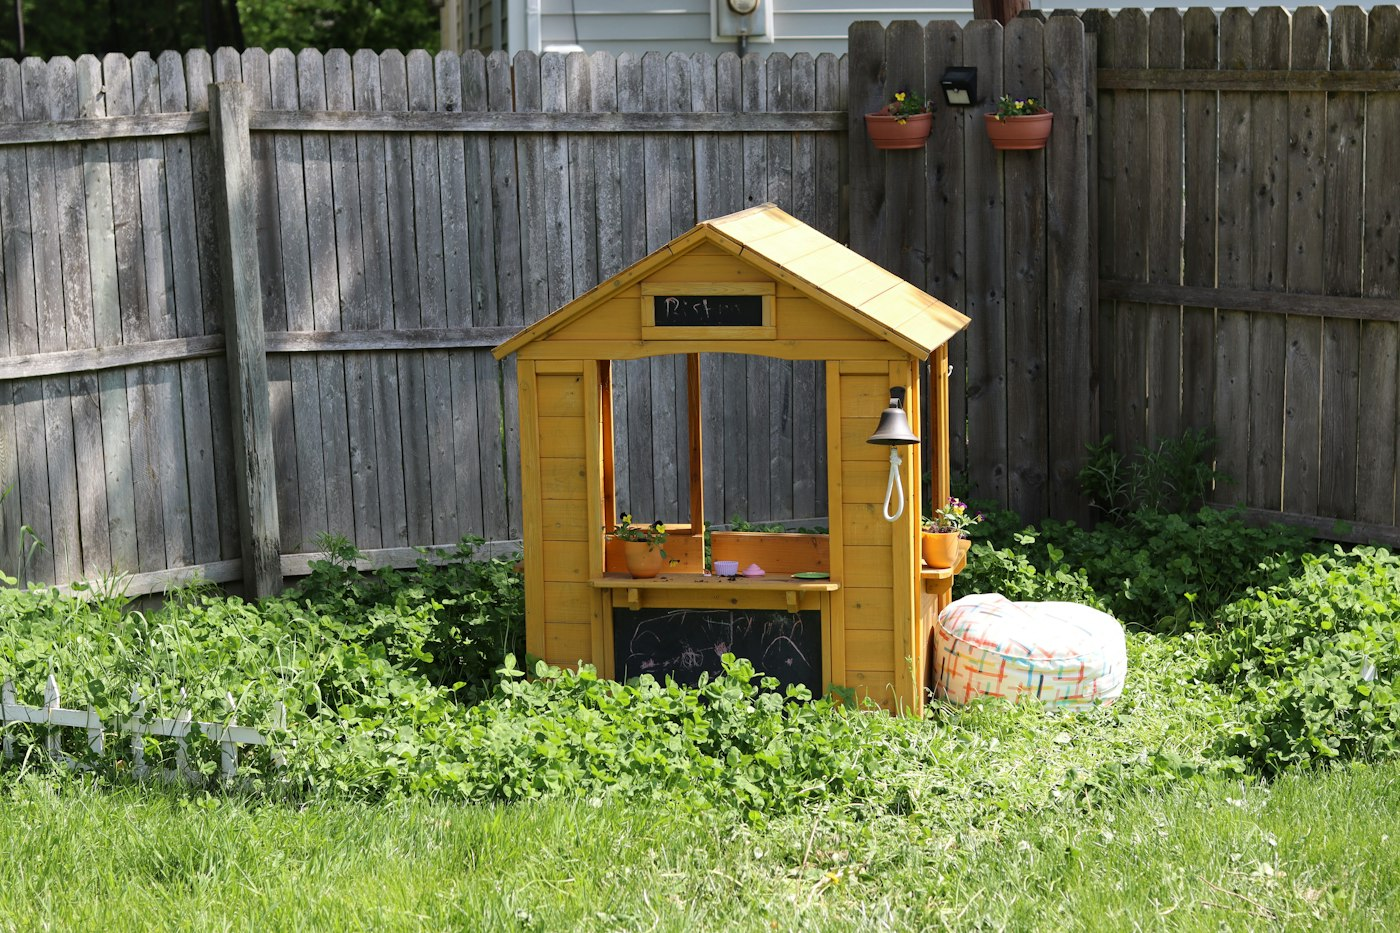
At its simplest, a mud kitchen is a sturdy low surface, such as a bench, an old table cut down or a few crates, with a bin of soil, a source of water and a collection of kitchen tools. Children mix, pour, stir, scoop and serve. There is no goal. The appeal is sensory and imaginative at the same time, and children from eighteen months to seven years find their own level in it.
Gather the Equipment
Most of what you need is already in your kitchen or at a thrift store:
- Metal or sturdy plastic bowls, pots and muffin tins
- Large spoons, ladles, whisks and spatulas, nothing sharp
- Small buckets and cups for water
- A bin or two of clean topsoil or potting mix without fertilizer or chemicals
- Natural extras: leaves, petals, grass clippings, pinecones and sticks as ingredients
- A watering can or a bucket of water, refilled by an adult
Skip glass, anything with small detachable parts and any soil treated with chemicals. Read the bag; plain topsoil or an organic potting mix labeled for children’s gardening is the safe choice.
Place It Carefully
A mud kitchen belongs as far from the soft play area and the food table as your space allows, ideally on grass or a patio that hoses off easily. Mud on vinyl play surfaces is a cleaning headache, and mud near snacks is unappetizing. Put the kitchen downhill or downwind of the rest of the party if you can, and create a clear path from the kitchen to a cleanup station so muddy children do not cut through the play area on the way.
Build the Cleanup Station
The cleanup station is as important as the kitchen. Set up a bucket of clean water or a hose with a gentle spray, a bar of soap, a stack of old towels, a bin for muddy clothes and a basket of spare socks and shirts. Ask parents in the invitation to bring a change of clothes or dress children in play clothes. Children move from kitchen to cleanup to socks to the next activity, in that order, every time.
Supervise and Set a Few Rules
Mud kitchens need an adult nearby, mostly to manage water and to keep soil out of mouths and eyes. A few rules said once and repeated kindly: mud stays in the kitchen, nothing goes in mouths, water is poured, not thrown, and tools are for cooking, not for hitting. Toddlers will test all four, which is normal. Wet soil can also be slippery, so keep the ground around the kitchen clear of tools.
A mud kitchen gives children who do not love climbing or group games a place to be absorbed. It pairs beautifully with a garden theme, an Earth Day celebration or any outdoor spring party, and the fascination it holds for a two-year-old is hard to match. The laundry afterward is real. So is the quiet concentration of a child stirring a pot of mud soup for twenty minutes, and most hosts decide that trade is worth it.
Step-by-Step: Setting Up the Mud Kitchen
A mud kitchen takes about an hour to set up if you have gathered everything in advance. Here is an order that works:
- Choose the spot. Pick a patch of grass or patio far from the play area and food, ideally close to a hose.
- Set up the surface. Place your bench, low table or crates on level ground. Check that nothing wobbles.
- Add the soil bins. Set them on the ground beside the surface or on a lower shelf.
- Arrange the tools. Hang spoons and ladles on hooks, or put them in a basket, so children can see everything at once.
- Prepare the water. Fill a bucket or watering can and keep it beside the adult in charge.
- Set out natural ingredients. A tray of leaves, petals and pinecones invites creative cooking.
- Build the cleanup station. Place it along the path between the kitchen and the rest of the party.
Mud Kitchen Play Prompts
Children rarely need instructions at a mud kitchen, but a few prompts can spark ideas:
- Mud pie bakery: Children fill muffin tins and decorate their pies with petals.
- Soup shop: Stir up a pot of leaf soup and serve it to a grown-up customer.
- Birthday cake: Build a mud cake with stick candles for the birthday child.
- Potion lab: Older preschoolers mix colored water from petals and grass.
Common Mud Kitchen Mistakes
- Too much water. A full bucket can turn the area into a swamp. Add water a little at a time.
- Placing it near the play area. Muddy feet and hands will find their way onto the equipment.
- No change of clothes. Remind parents on the invitation and keep spares on hand.
- Using garden soil from an unknown source. Soil that may contain chemicals, sharp debris or pet waste is not safe for play.
- Forgetting about cleanup time. Plan for children to visit the cleanup station before cake and snacks.
Keeping the Play Area Clean
If you are pairing a mud kitchen with an outdoor soft play setup from us, plan your layout so the two are far apart, with the cleanup station between them. A simple rule, such as “wash, dry and socks before the play area,” keeps the equipment clean for every child. Share your yard plan with us when you book, and we can help you choose a spot for the play area that stays well clear of the mud.
Questions Parents Ask
What age is right for a mud kitchen?
Children from about eighteen months to seven years enjoy it, with younger ones needing closer supervision.
Can we use sand instead of soil?
Yes. Play sand is a cleaner option and works well with water for building and shaping.
How do I handle a child who hates getting dirty?
Offer gloves, an apron or tools with long handles, and let them help with the dry ingredients.


